Grafana Authentication with Microsoft Entra ID (earlier known as Azure AD) and Okta
Reading Time: 5 minutes

A recent study on cyber security revealed that over 82% of data breaches were caused by authentication issues — stolen or weak credentials. With the rising demand for robust security measures and seamless user experiences, managing access to critical monitoring and observability platforms has become increasingly complex.
Grafana stands out as a leading open-source solution to this problem with an array of authentication methods for streamlined yet secure access control. It is a popular open-source platform for monitoring and observability, known for its flexibility and versatility in visualizing data from various sources. There are various authentication methods available in Grafana to verify user identity. The authentication configuration dictates which users can access Grafana and the methods they can use for logging in.
In this blog post, we will go through the process of setting up Grafana in Kubernetes with external identity providers like Microsoft Entra ID and Okta for authentication.
Prerequisites –
Before we begin the configuration process, we must ensure the following prerequisites:
- A running Kubernetes cluster.
- Helm is installed on the local machine and Tiller (Helm’s server component) is running in the cluster.
- An active Microsoft Entra ID account.
- An active Okta account.
- Access to the Kubernetes cluster for Helm chart deployment.
Grafana Deployment –
This section will guide you through the necessary steps to deploy Grafana within a Kubernetes environment using the Helm chart. It is a streamlined approach to managing applications in Kubernetes clusters and provides a foundation for implementing secure and efficient monitoring solutions.
Link to helm charts: https://github.com/grafana/helm-charts/blob/main/charts/grafana/values.yaml.
- Open a terminal and ensure Helm is initialized:
- Next, we’ll need to add the official Grafana Helm repository:
- Update the local Helm repositories:
- Now we can deploy Grafana with Azure AD or with Okta authentication using the below steps –
helm init
helm repo add grafana https://grafana.github.io/helm-charts
helm repo update
Configure Azure AD Authentication –
This segment outlines the essential steps required to configure Grafana’s authentication with Microsoft Entra ID. It ensures a robust and secure authentication mechanism and enables you to control user access and permissions efficiently.
- Log in to Azure Portal (https://portal.azure.com/ ), then click Azure Active Directory in the side menu.
- Navigate to “Azure Active Directory” and select “App registrations.”
- Click “New Registration” to create a new application registration.
- Provide a name for the application, and select the appropriate redirect URI for Grafana and https://your-grafana-url. Then click Register.
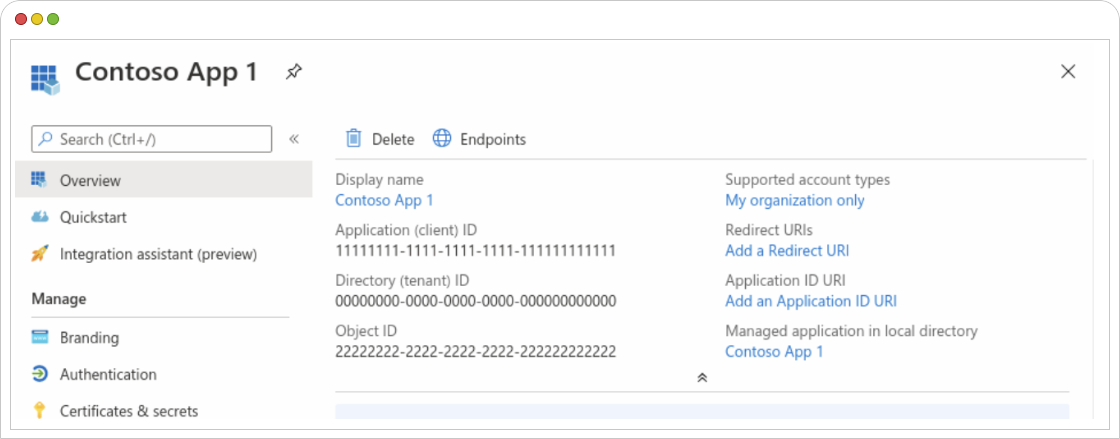
- After registering the application, The app’s Overview page opens. Note down the “Application (client) ID” and the “Directory (tenant) ID.”
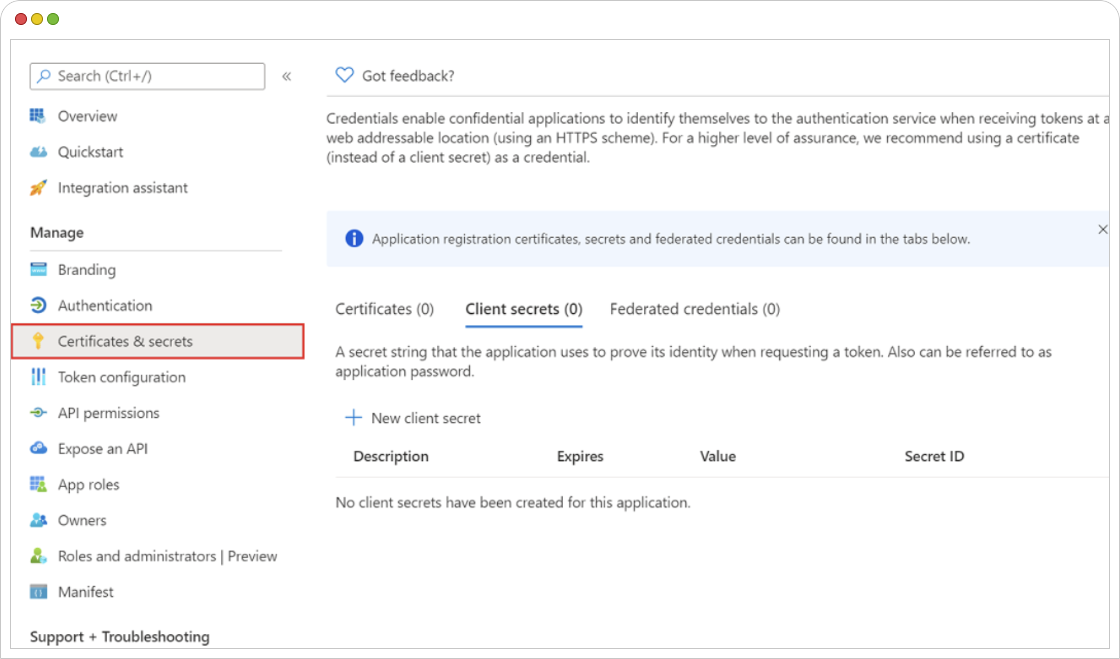
- Under the “Certificates & secrets” section, generate a client secret, and make sure to note it down securely.
- In the Grafana helm chart, we can set configuration values using the values.yaml file. Below is the sample configuration to add in values.yaml under grafana.ini section:
- allowed_organizations is to limit access to authenticated users who are members of one or more tenants. Set allowed_organizations to a comma- or space-separated list of tenant IDs. We can find tenant IDs on the Azure portal under Azure Active Directory -> Overview
- allowed_groups limit access to authenticated users from one or more groups, set allowed_groups to a comma- or space-separated list of group object IDs. The object IDs for a specific group on the Azure portal: Go to Azure Active Directory -> Groups.
- Replace the placeholders with the Azure AD credentials and customize other settings as needed. We can also use environment variables to configure client_id and client_secret instead of hardcoding them.
- Install or upgrade Grafana using the helm chart
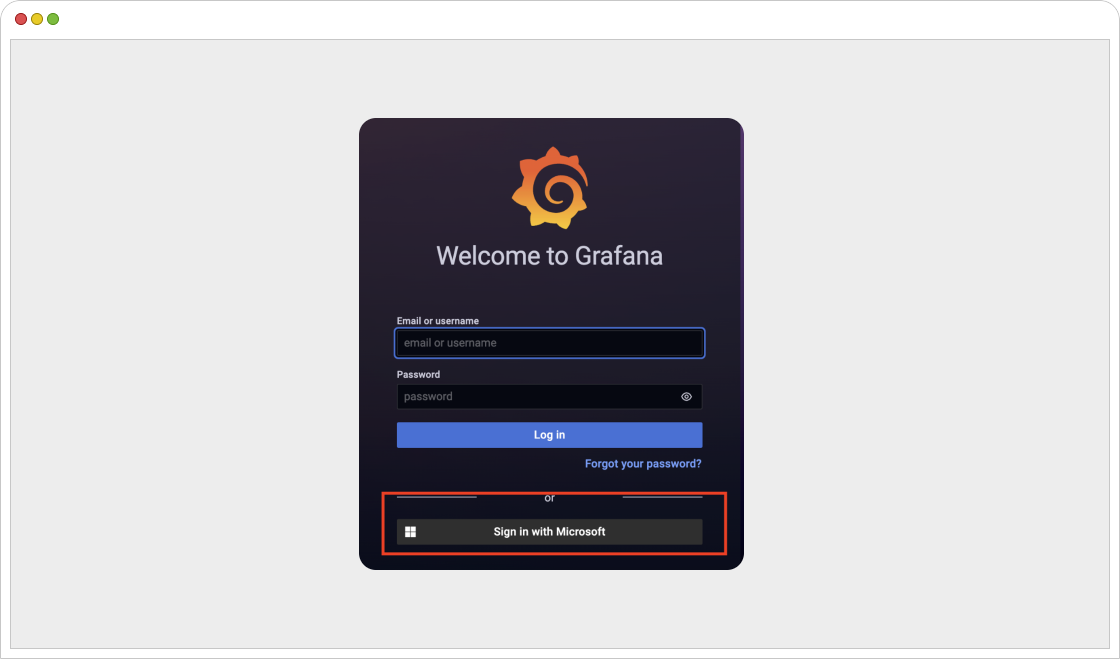
- We will now get “Sign in with Microsoft” option on Grafana web
grafana.ini:
  auth.azuread:
    name: Azure AD
    enabled: true
    allow_sign_up: true
    auto_login = false
    client_id: YOUR_CLIENT_ID
    client_secret: YOUR_SECRET_ID
    scopes: openid email profile
    auth_url:
https://login.microsoftonline.com/AZURE_TENENT_ID/oauth2/v2.0/authorize
    token_url: https://login.microsoftonline.com/AZURE_TENENT_ID/oauth2/v2.0/token
    allowed_groups: GROUP_OBJECT_ID
    allowed_organizations: TENANT_ID
where
helm upgrade -install chart_name -f values.yaml.
Configure Okta Authentication –
Explore the step-by-step process of integrating Okta’s authentication services with Grafana, allowing for a smooth and secure user authentication experience.
- Log in to the Okta admin console (https://your-okta-domain.okta.com).
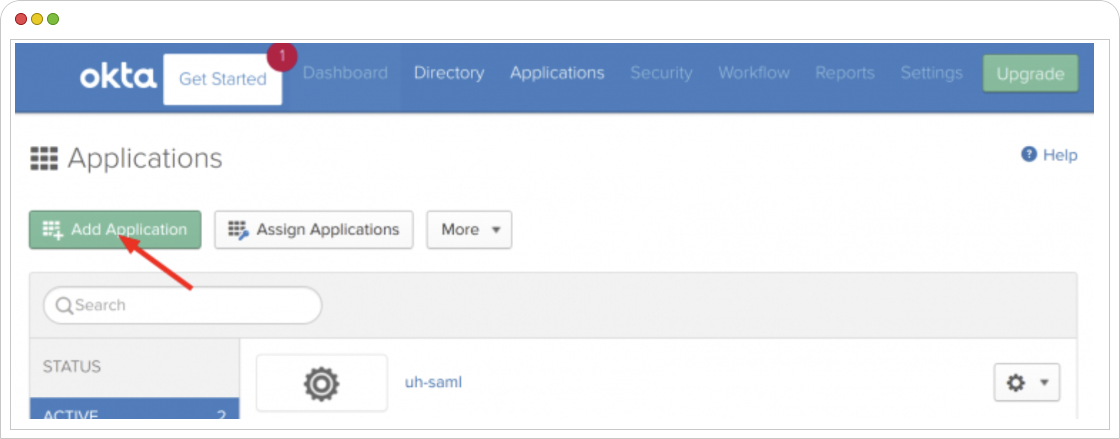
- In the Okta dashboard, navigate to “Applications” and click “Add Application.”
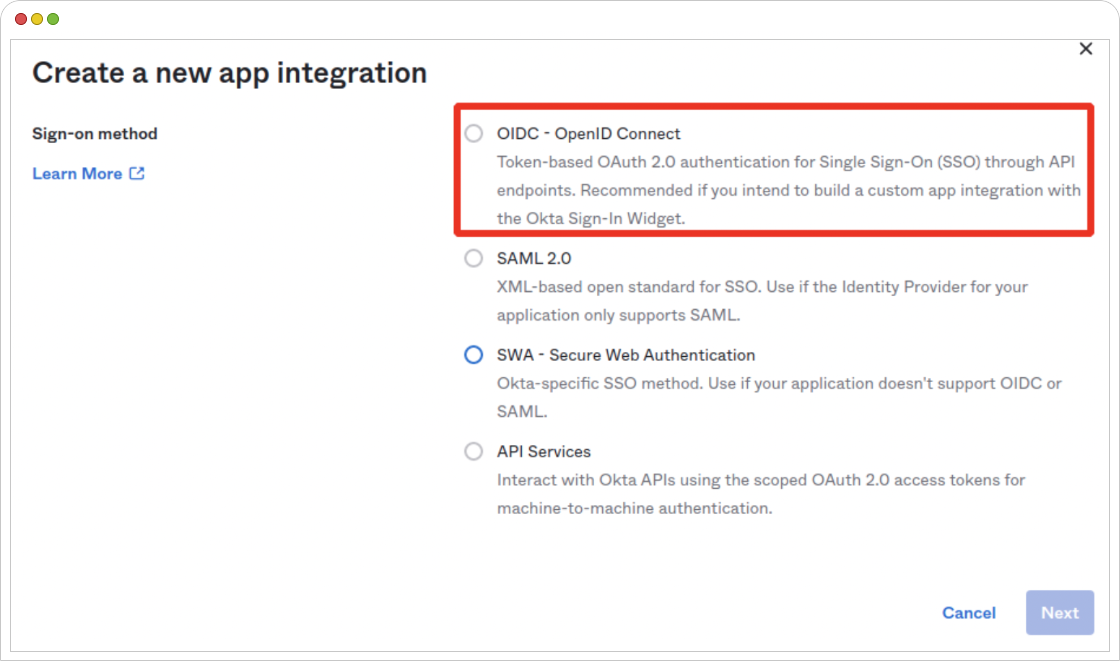
- Choose the “Web” platform, and then select “OpenID Connect.”
- Configure the OpenID Connect application settings, including the “Login redirect URIs” like https://your-grafana-url/login/okta and https://your-grafana-url.
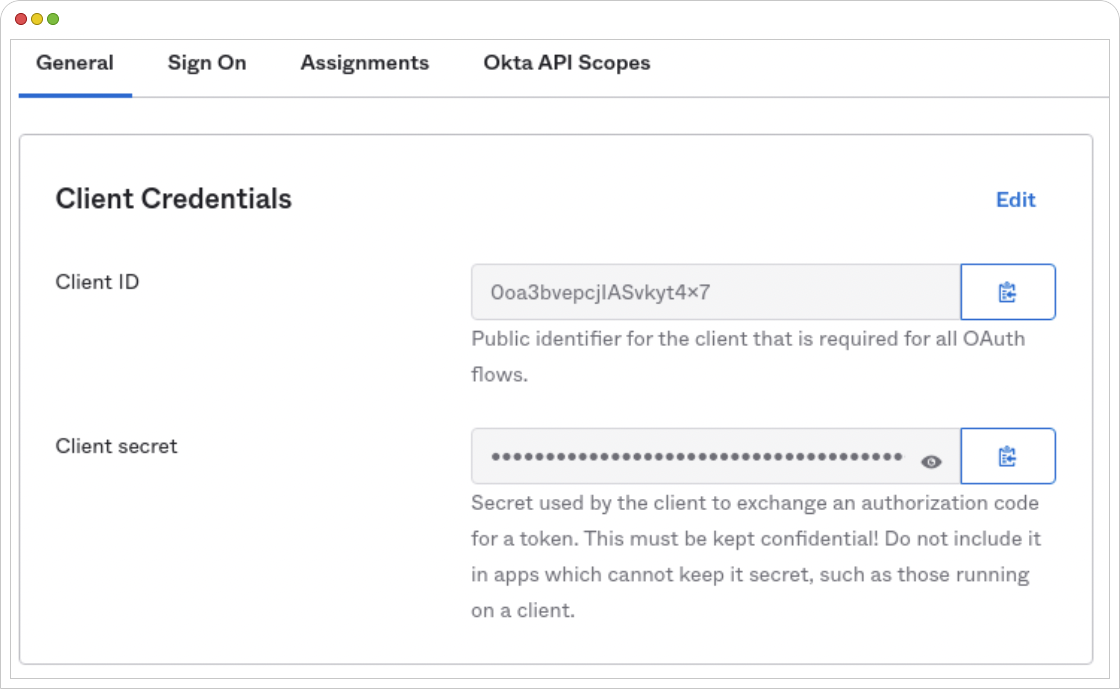
- Save the application settings and note down the “Client ID” and “Client Secret.”
- In the Grafana helm chart, we can set configuration values using a values.yaml file. Below is the sample configuration to add in values.yaml under grafana.ini section:
- Replace the placeholders with the okta credentials and customize other settings as needed. We can also use environment variables to configure sensitive values instead of hardcoding it.
- Install or upgrade grafana using helm chart
- We will now get “Sign in with Okta” option on Grafana web
grafana.ini:
  auth.okta:
    name = Okta
    enabled = true
    allowed_domains: example.com
    client_id = YOUR_OKTA_CLIENT_ID
    client_secret = YOUR_OKTA_CLIENT_SECRET
    scopes = openid profile email
    auth_url = https://your-okta-domain.okta.com/oauth2/default/v1/authorize
    token_url = https://your-okta-domain.okta.com/oauth2/default/v1/token
    api_url = https://your-okta-domain.okta.com/oauth2/default/v1/userinfo
helm upgrade -install chart_name -f values.yaml .

Author Bio:
Swapnil More is the DataOps Engineer II at Sigmoid with over 4+ years of hands-on experience in DevOps, DataOps, CloudOps etc . As a DataOps Engineer, Swapnil is passionate about automating and optimizing the software development process, streamlining continuous deployment pipelines, infrastructure automation and management.
Featured blogs


Featured blogs